Create New Survey
| Create New Survey |
|---|
Short Description
Process of creating a new survey.
Description
The system offers a module thanks to which the user can create surveys and present in tabular and graphical form responses to survey questions.
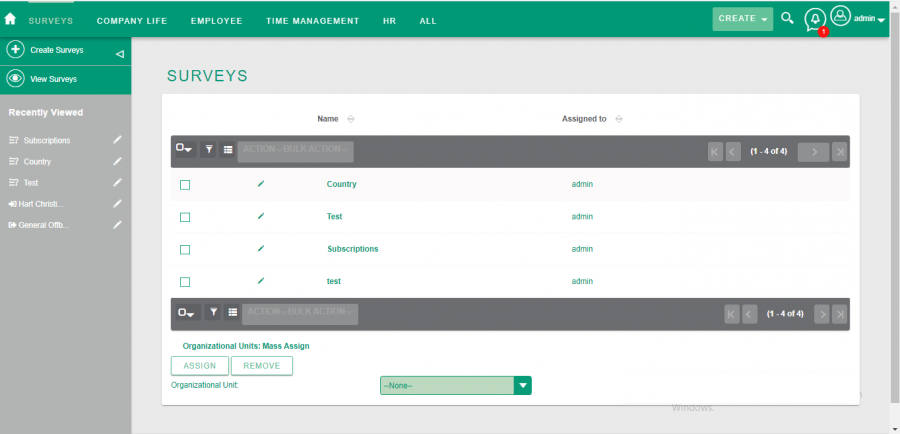
1. To create an survey you have to go to the module Surveys and click Create Surveys button.
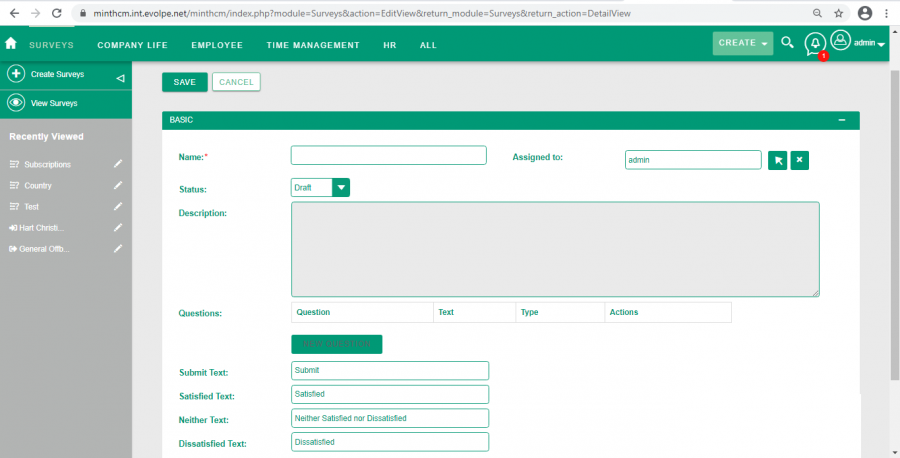
Fields in the create Surveys view:
- Name- determine a name of Survey. This field is required.
- Assignet to- user whom the survey is assigned to.
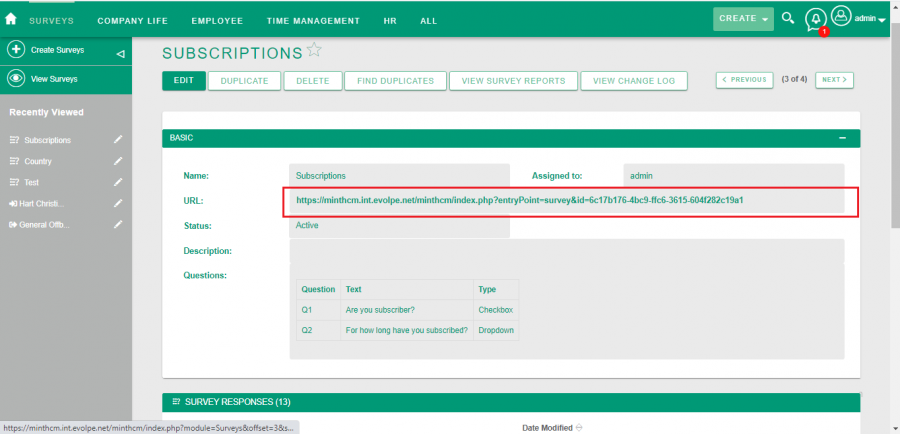
- Status- in this field, the user sets the status to generate a URL link to the survey. If the status is Draft or Closed, the link will not be available. If the status is Active, the link to the survey will be provided in the URL field.
- Description- provide a description of an survey.
- Questions- a field in which the user enters the content of the survey questions and sets the question type. More about question options.
- Submit Text- the field in which the user enters the text displayed on the survey approval button.
- Satisfied Text- the field where the value of the choice option used in the "Matrix" question type is entered.
- Neither Text- the field where the value of the choice option used in the "Matrix" question type is entered.
- Dissatisfied Text- the field where the value of the choice option used in the "Matrix" question type is entered.
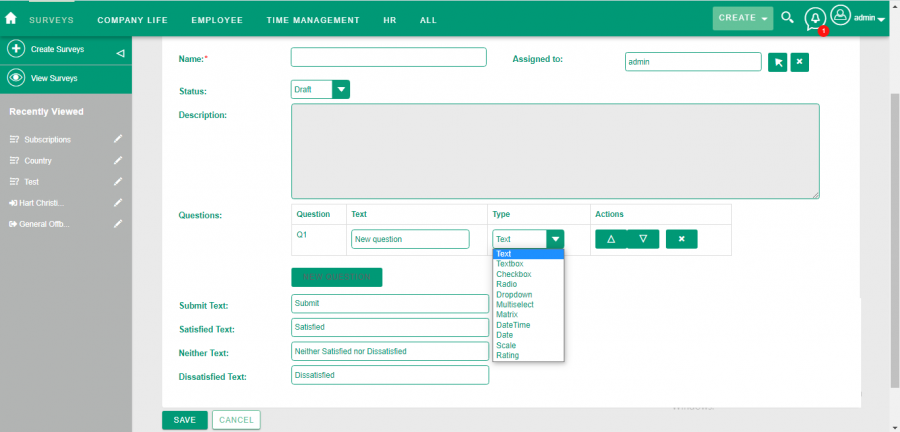
To create a survey user click button "New Question" and enters the text in the "Questions" field and sets the type. The user can choose from several types of questions. Some types require additional options, then to add option used botton "Add option" . Three buttons will appear next to the question you created:
- up arrow - move the question one up
- down arrow - move the question one down
- cross - delete question
After completing the fields, save the record. It will appears on the list view. In the list view user can see the details of the survey. if the user wants to see the details of the survey, it is enough to click on the record from the list view.
2. Detail view of created survey
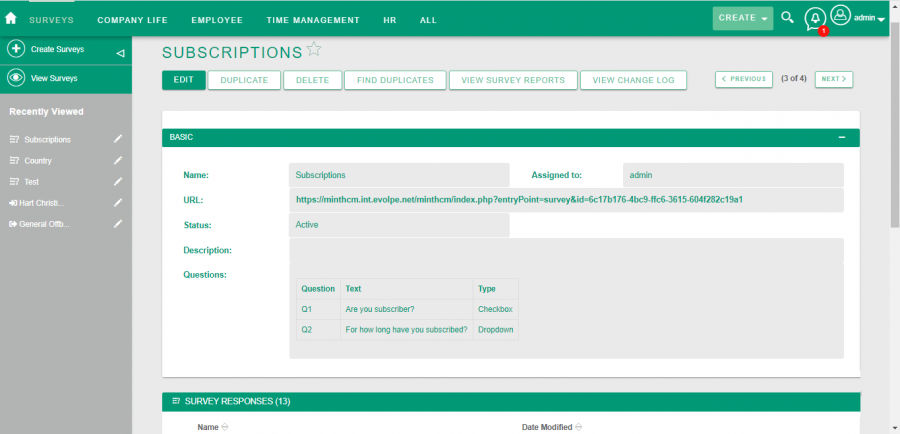
In the detailed view of the survey, the user can see all the data he provided when creating the survey. Additional field on detail view is URL field in which the link is automatically generated after setting the status to "Active".
To check the number of received responses, go to the "Survey responses" subpanel at the bottom of the page. In this subpanel user can check every single response and creation date or if he want remove response.
The top part of the page shows the actions that can be done with the survey:
- Edit- this button causes the user to go to the survey editing page.
- Duplicate - generate new rekord with the same data as survey
- Delete - remove survey
- Find duplicates - finds the same survey
- View survey reports - button that starts the analysis of the survey responses
- View change log - button to open page with the changes made in survey
3. Completing the survey and sending responses.
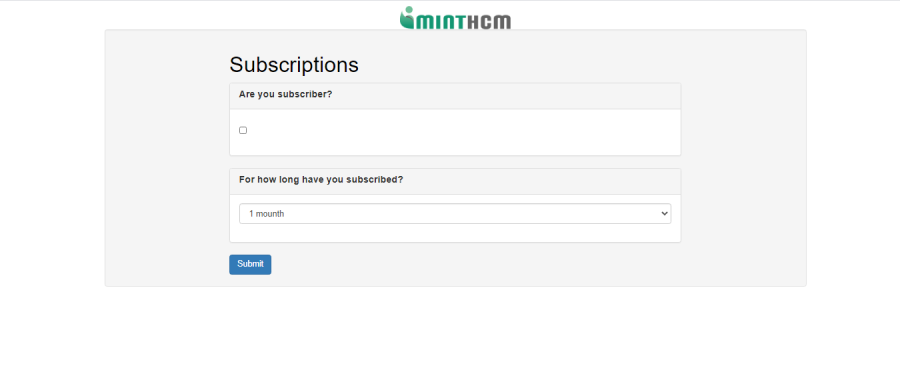
In order for the user to be able to complete the survey, he must set the Status to Active before and send the link or click on it after it is generated. After entering the link, the user opens a page where he can answer questions from the survey.
The page is automatically generated by MintHCM and completed with questions and possible answers entered by the user. At the top of the page is the title of the survey provided when creating it, below all the questions with answers in the order set by the user. At the bottom of the survey, there is a button with the same text that was entered in the Submit Text field when creating it.
After clicking the Submit button, the answer with the completed questions was sent to the MintHCM system and included in the survey analysis. The date of adding the answers and details the user can see in the Survey Responses sub-panel.
After sending any responses, it is not possible to edit the Questions field.
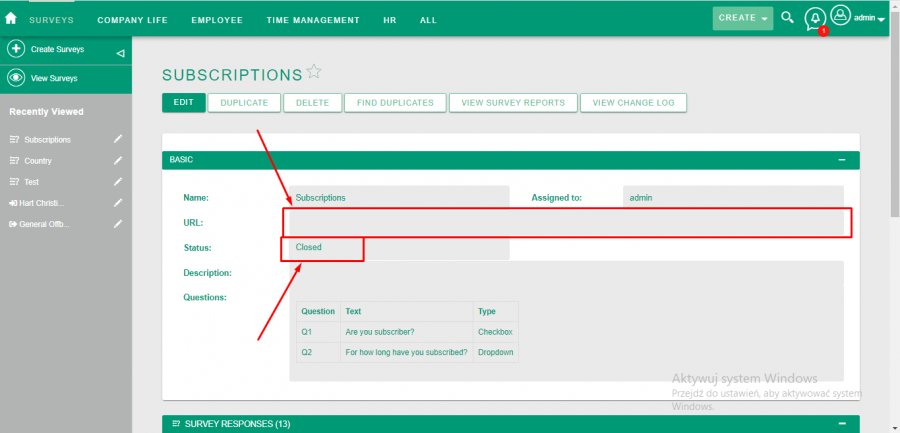
After completing all sent surveys, the user can change the Status to Closed, then in the detailed view of the survey in the URL field the link will be not available.
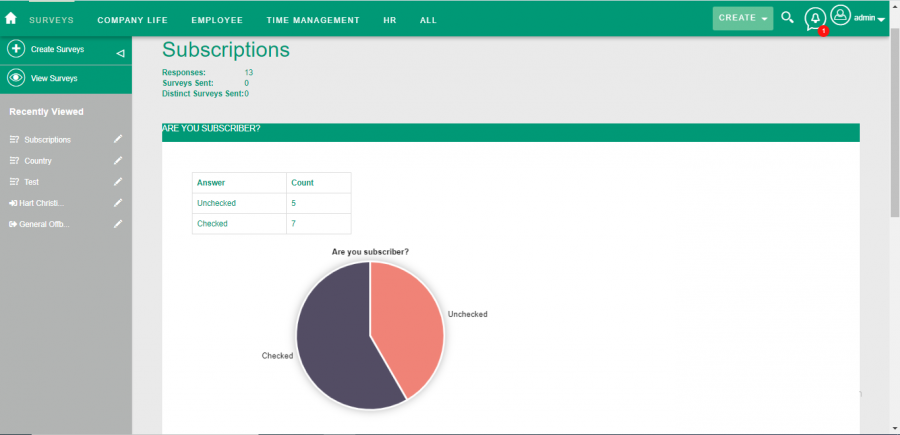
User can check the analysis of the answers to all questions by clicking on the View Survey Reports button.
At the top of the analysis page, there is the name of the survey that the user entered when creating, below you can see the number of responses received, the number of surveys sent by the user and distinct Surveys Sent. Below, in the order set by the user, there are survey questions along with a summary of the responses received in tabular and graphic form.
To stop displaying and completing the survey, the user must set the status to Closed.
