Installation guide
| MintHCM Installation Guide |
|---|
Contents
Short Description
Installation guide for MintHCM
Preparing for installation
To install MintHCM you will need Linux or Windows platform, a web server with PHP installed and a database.
First step towards installation is downloading MintHCM to your server and preparing files to be installed. To do so, follow the steps:
1. Download MintHCM zip file from https://minthcm.org/download/
2. Copy zip file to your server and unzip it in directory of your choice
3. Change files permissions in that directory accordingly with your platform demands.
For Ubuntu Linux/Apache it will be:
cd ../<yourMintHCMdirectory>
sudo chown -R www-data:www-data *
sudo chmod -R 755 *
where www-data is default user and group for Ubuntu Linux/Apache. It however might have been changed on your server. Use the actual system user of your server.
Installation of MintHCM
Once you have your files prepared, you can start actual installation. Follow the steps:
1. Put following URL into your web browser:
http://<yourServer>/<yourMintHCMdirectory>/install.php
The installation wizard will start now.
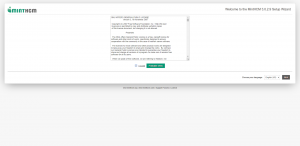
2. On the first screen you have to accept the license agreement. After that you can click next button.
3. After a moment another screen with system environment information will appear.
What is really important here is an instruction how to set up a Crontab, that allows MintHCM to perform actions in the background of your server. You should do this only after the installation is concluded.
To do so, you have to edit your web server user's crontab file. You can open it with teh command:
sudo crontab -e -u www-data (or another actual user)
Now you have to add the following line to the crontab file:
* * * * * cd /var/www/MintHCM/MintHCM; php -f cron.php > /dev/null 2>&1
Information about Crontab edition may be also found in Schedulers in Administration panel after installation.
Note that Windows or other systems have different background processes mechanisms.
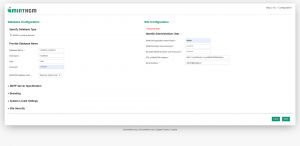
4. On next screen you have to provide basic database configuration and administrator user data.
If your database is on the same server that MintHCM instance, you may put 'localhost' in Host Name field. If its somewhere else, put there an URL to your database.
MintHCM Database User is by default set to admin. If you want to choose another user, change it here.
5. Set up your administrator user name and password, so you can log in MintHCM later.
In these screen you can also configure basic global settings of your MintHCM instance, such as email server settings, branding (including logo of your company), system settings (i.e. time and data format) and security options. All of those settings may be configured after the installation as well.
6. If everything was alright with data provided, installation will begin. It may take a while.
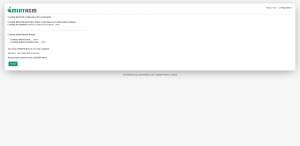
7. After installation is completed you will see the last screen. Among others, it provides information of total time of installation and memory use.
After you click finish, installation will be finished and you can log in your MintHCM instance as admin with username and password provided during installation.


